Category Archives: vegan
Quick post.. A tutorial on Idlies?
I had no idea of what I would be blogging about, or even if I was going to post today. Yes, there are a couple of posts sitting in my drafts column, that I was to publish in the next couple of day, but it was never going to be plain Idlies.
So, back to basics? What are Idlies? Answer: they’re basically spongy steamed cakes made with a fermented rice and Urad lentil batter. The perfect healthy blend of protein & carbs, The fermentation confers a depth of Umami and one of the best things is that you can pair the cakes with just about anything, Sugar, ketchup, Sriracha, and the usual chutneys, the milaga podi, Sambar & yes, Fresh home made yogurt.
The purpose of this post is not about sharing a recipe for idli. Its a classic national dish and there are countless sites you could get it from. Its about discussing the myriad ways that one could shape them. I’ve been making unconventional Idlies way, way before I even knew that there was such a thing as food blogging. (even if a certain pompous dame of the British Empire claimed along with BBC Good Foods (India) magazine that they invented the cupcake mold version.), And I’m not alone, countless mothers must have done this before me. And it was out of pure necessity, in other words, getting my kids to eat healthy stuff in cute forms. Silicone cupcake molds were merely the first. They could be fitted into a conventional Idli stand with the lenticular molds and steamed, and yes filled up with fresh blueberries or even a Hersheys kisses pressed in for a molten chocolate variety.
Well, Its been years since I revisited the shaped idlies until yesterday when I spotted some long forgotten silicone molds from years ago and opted to make a kid friendly lunch for my son to get the week kicked off.
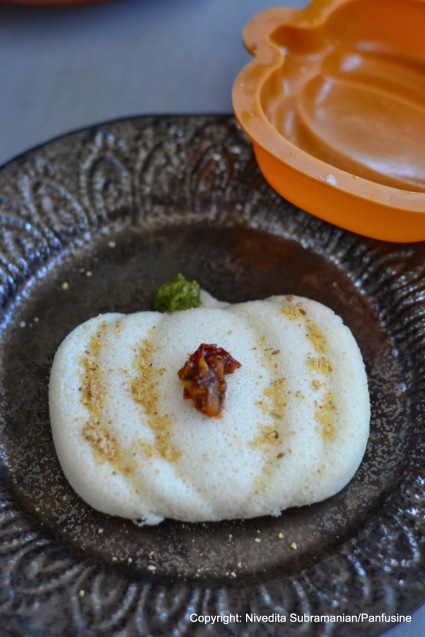
Before I knew it, I was out looking for more shapes just to use for this post. It turns out that Crate and Barrel the store from which I picked up the pumpkin and leaf mold had discontinued them and I had to settle on this Ice cube tray.
well, they worked perfectly, did not twist out of shape when I lifted the tray onto the pan to steam, and the best part, the idlies just dropped out, unlike the conventional mold where you need to scoop them out.
MOLDED IDLIES
I’m just going to link the detailed recipe for the idli batter from my friend Dhivya’s blog ‘Chef in you’.
The Tovolo Jumbo ice cube tray accommodates 2 oz of batter which produces a near perfect cube.
Brush the inside surfaces of the tray with oil. (it isn’t really necessary, since the silicone does release the finished product, but the oil really helps in sliding the entire cube out without even a morsel sticking to the pan).
Ladle the batter into the sections of the ice cube tray. Place the tray over a steamer basket in a skillet (with a cup of water added to the bottom. Cover with a lid and steam for 10-12 minutes on medium heat.)
If you do manage to spot silicone molds in different shapes like this pumpkin, pick them up, the work great for pretty party designs. (2 – 3 oz of batter steamed for 12 minutes). The only drawback is that you have to make them one at a time (or have a really wide skillet and an equally large lid to keep multiple molds flat without squishing them.)
So go ahead, think outside the mold and let the idli imagination run wild, your kids will love you for it!
Bon appetit!
PS: An update: For more intricate shapes like this gorgeous snowflake, Just make sure to oil the inner surface of the mould design that comes into contact with the batter, Steam and allow the mold to cool down completely before attempting to push out the idlies. I used a seasonal silicone ice cube tray to make these beauties.
The ‘We knead to bake project’ # 10 – 100% Whole wheat bread
When using flours that are not subject to heavy processing like all purpose flour is, its essential to understand the starting material in order to create a flavorful bread. WHeat flour is a jumble of bran, germ & starch. Starch yields the familiar flavor of bread, but cannot effectively do so in the presence of plain bran & germ. These nutrient rich components need to be coaxed to release their flavor, soften and undergo a bit of enzymatic change before they release their goodness, and Reinharts technique aims to ensure that perfectly.
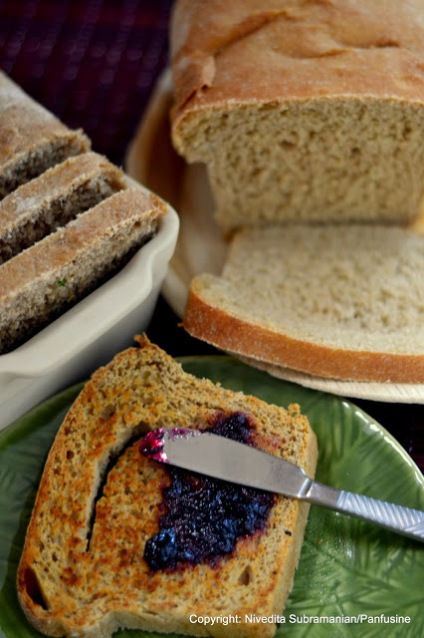
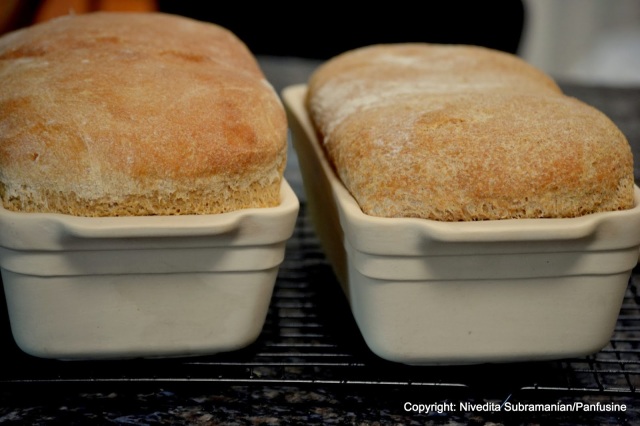
I opted to use Lemon juice in the soaker and sponge in order to help the strands of gluten develop (gluten is a protein which ‘clump’ together in the presence of acid) and also boosted up the gluten up a notch by adding a bit of extra wheat gluten. My first loaf was with a regular whole wheat flour without gluten, the second with a coarser whole wheat Pastry flour, and the third with an organic whole wheat flour from India that I use to make roti. Needless to say the softest was the third one, while the pastry flour bread yielded a nutty flavor & a chunky texture. The first loaf I made was riddled with a number of errors and did not rise quite as much as a consequence.
Step 1- Making the soaker and the Biga/Sponge:
Inviting Light & Prosperity into our homes – Happy Diwali.
Ever notice the best festivals & feasts usually occur towards the end of the year? I think it has everything to do with the days getting shorter. In South India the season kicks off with Krishna Jayanti in September, followed by Navratri, Diwali, Karthigai, Combined with Labor day in September, Halloween, Thanksgiving , Christmas & New Year celebrated in the US of A, thats a lot of festive days to look forward to. No wonder it gets dreary once January 2nd comes around, but then by that time, the days begin to stretch out longer again.
The concept probably precedes religion, or co-evolved along with it. With the end of harvests, It was time to huddle up and and spend the cold months waiting for the seasons to change again. Festivals must have been a natural social response in the absence of much to do and of course to dispel the invariable fright that darkness brings.
Well, I’m certainly not complaining, the plethora of opportunities to indulge in kitchen capers, the shopping spree for ingredients, whats not to love?
At home there are traditional dishes and then there are the creative ones, and the ones I like best, the healthy creative ones, the stuff that you can scarf down without having to worry too much about the amount of fat that went into it. This year the confection list included the decadent ‘T-B-A shortbread’
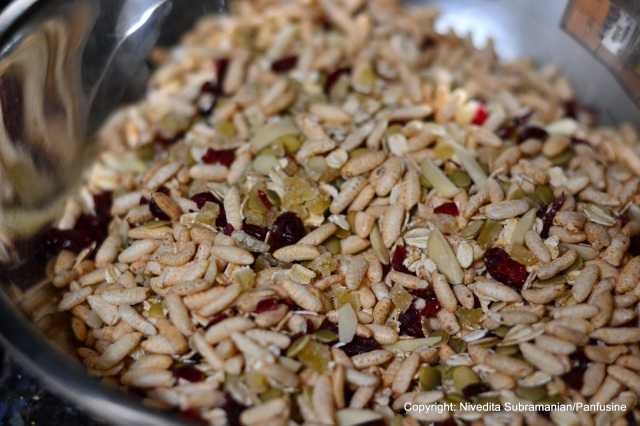
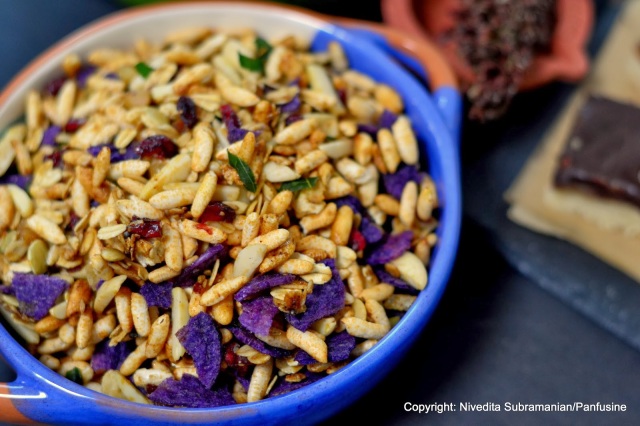
and a baked granola like chivda which I’ve been gulping down by the handful. This snack is common throughout India and has more than one name depending upon which state its made, Chivda, chevdo, chanachoor, mixture. Each state adds its own flavoring and ingredients. Raisins are common in the Maharashtrian version, plantain chips & curry leaves in the South Indian Mixture, Sugar in the Gujarati version and so on. The common thread in all these versions is that the final mix is invariably deep fried.Growing up in India, one of my favorite things about Diwali was savoring all the different versions that were exchanged between the neighbors and to this day, I cannot think of any one version that stood out. I loved them all with equal delight!
This weeks Diwali post combines all my favorite aspects of the chivda variants and makes it healthy to boot. The only deep fried part is the addition of broken purple potato chips. they make a beautiful contrast to the dried cranberries added to the mix.
Baked Granola Mixture
You need:
2 cups puffed brown rice cereal (the unsweetened type, I used Arrowhead Mills)
1 cup Rolled oats (Bob’s Red Mill has a great product)
1/2 cup sweetened dried cranberries or dried cherries, chopped
1/2 cup candied ginger, chopped
1/2 cup slivered almonds
1/2 cup raw pumpkin seeds
4 oz kettle cooked potato chips (the thick ones)
For the tempering:
4 tablespoons sesame or peanut oil
1 heaped tablespoon black mustard seeds
1 tablespoon cumin seeds
2 sprigs curry leaves finely cut into a chiffonade
1/4 teaspoon asafetida powder
1/4 teaspoon Cayenne pepper powder
3/4 teaspoon fine sea salt
3 tablespoons molasses
Line 2 cookie sheets with Aluminum foil. Preheat oven to 225 F.
Combine the puffed rice, oats, sweetened dried cranberries, ginger, pumpkin seeds and almonds in a large bowl.
Heat the oil in a cast iron pan. once it begins to shimmer, add the mustard seeds. Once they’ve ‘popped, add the cumin seeds. (Cumin fries much faster than mustard and thats why I add it after the mustard). Once the cumin seeds ‘split’, lower the heat and add the curry leaves. Stand back since they tend to sizzle and spatter oil around, thanks to the inherent moisture. Turn off the gas or remove the pan from the heat and then add the cayenne, salt and asafetida. Last, add the Molasses (it helps to use a spoon coated with oil, to ensure that all the molasses just drips off the spoon without sticking).
Pour out the mixture into the center of the bowl with the other ingredients. Fold gently to coat evenly.
Distribute the mix evenly between the two baking sheets into a thin uniform layer.
Place into oven and bake for 20 minutes, making sure to stir the mix every 10 minutes. At the end of the 20 minutes, increase the heat to 250 F and bake for 10 minutes more. This ensures that the almond slivers get nice and crunchy. remove the trays from the oven and allow to cool completely. Crush the potato chips lightly and blend into the mix. Store in an airtight container once cooled completely.
Wishing everyone prosperous times ahead. Happy Diwali!
Recreating flavors (or at least trying) – White turnip stew with toasted Chana dal.
Turnip ‘Kootu (Stew) with toasted Channa Dal
The ‘We Knead to Bake’ Project 2013 # 9- Khaliat Nahal (honeycomb bread), Mumbai street food Ishtyle
I had hoped to bake 12 breads — one for each month of the year but it appears that hopes of a perfect record are moot, I missed the bread from last month – Pretzels, since I was on holiday. The good part, I got to personally deliver my excuse to Aparna Balasubramanian while on holiday in India.
The only problem with Indian holidays is that you’re left with a profound longing for the delicious foods that you indulge in, long after you get back to home base, i.e, The US of A. One of the dishes I missed out on this trip was authentic Vada Pav, the kind you buy from street vendors, not in restaurants.
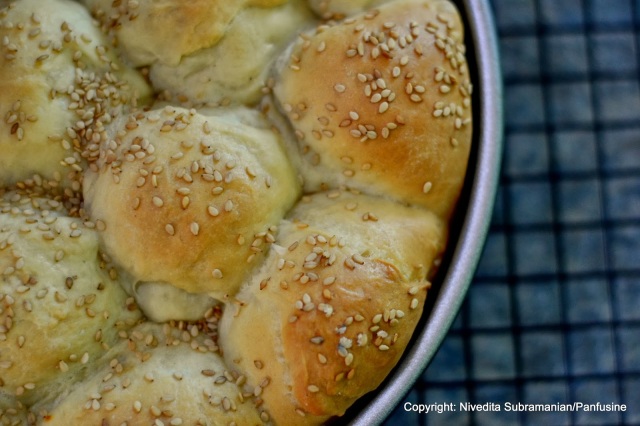
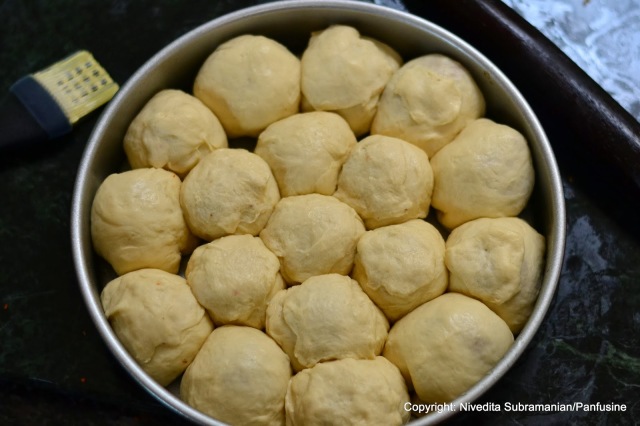
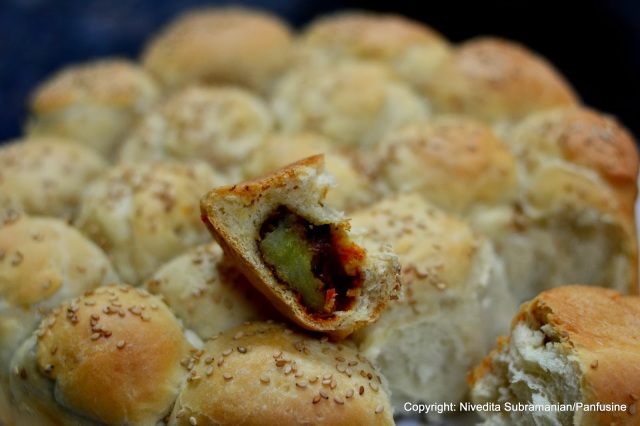
When the time came to bake this months bread, It didn’t take long to decide what I wanted to fill it with, and tradition took a LOOONG hike into the Arabian desert! This months bread was a middle eastern classic Khaliat al Nahal ,translated as Bees Hive in Arabic for its honeycomb structure. The traditional version is a sweet one, filled with plain cream cheese & drizzled liberally with sugar syrup flavored with rose, saffron or cardamom.
And of course as usual, I tend to deliberately go the opposite direction.
This was a perfect opportunity to indulge & give in to my Vada Pav craving AND test out yet another one of Aparna’s fabulous bread selections & so, here is my bread creation # 9, for the month of September. The garlic chutney that coats the vadas in each of the little honeycomb buns is entirely optional, but here’s the recipe if you’re interested.
Note: As intimidating as 18 servings can be, they’re small 2 bite versions of the real thing, & they tend to disappear quickly. all the better since they don’t taste that good, (rather stale), the next day. Finish them off the same day by sharing with friends & Family!
For the Vadas:
4 large Idaho potatoes, boiled in their skins
2 tablespoons oil for the seasoning
1 teaspoon mustard seeds
2 green chiles chopped coarsely
1 large clove of garlic, finely minced
1 inch piece fresh ginger, grated fine
1 sprig curry leaves, torn into small bits
1/8 teaspoon turmeric powder
Salt to taste
1 cup chickpea flour
1/2 teaspoon Red Chile powder
1/2 teaspoon Baking powder
1 pinch turmeric powder
Plain seltzer water as needed
2 cups oil for deep frying
Peel the potatoes & crumble. Set aside
Heat the 2 tablespoons of oil in a skillet. when it gets hot, add the mustard & allow it to sputter.
Add the green chiles, ginger & garlic, Saute till the garlic emanates an aroma. Add the curry leaves, stir and add the turmeric & salt. Remove from fire, mix well and add to the crumbled potatoes.
Combine the seasoning until its well distributed in the potatoes. using melon baller, scoop out potato mixture, and shape into spheres about 1 inches in diameter. Cover with a plastic wrap & refrigerate till ready to fry.
Combine the chickpea flour, baking powder,salt, turmeric & chile powder. mix with a fork to distribute the spices. Add seltzer to make a batter the consistency of pancake batter.
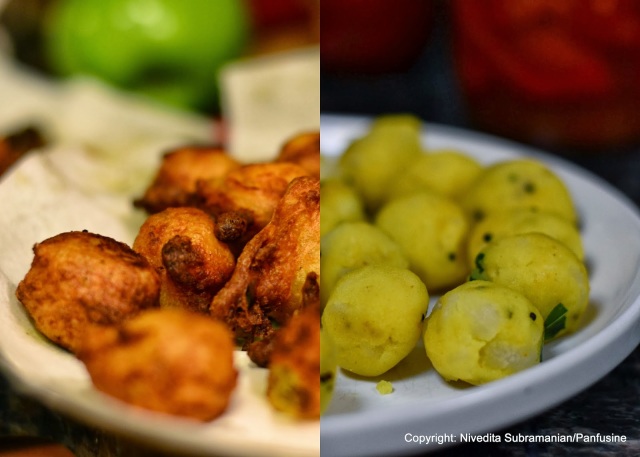
Heat 2 cups of oil in a cast iron pan. when it just about begins to smoke, dip the potato spheres into the batter completely coating them & drop into the hot oil. Fry till golden brown. Remove and place on a plate lined with paper towels.
Set aside 18 of the best looking vadas to cool down to room temperature, and feel free to gobble down the rest!
Khaliat Nahal Vada Pav:
You need: (for the dough)
Serve warm with a cup of Masala Chai.
This Bread is being Yeastspotted.
Bon appetit!
Product Review: Ninja Mega Kitchen system and a recipe for Masala Dosa
One of the biggest reasons for attending conferences is the priceless experience of meeting fellow bloggers and get an invaluable exposure to all things culinary. This includes vendors with new products to savor and get inspiration from.
I had no complaints about whatever appliances I had for making traditional Dosa (Traditional South Indian rice & lentil crepes) batter, a sturdy tabletop stone grinder that you could add the Urad dal, turn the timer on , and 30 minutes later, come back to a container full of fluffy, batter with the consistency of whipped egg whites. The
The cons of this is the cleaning up, of the various parts, the roller, the grinding bin, the multiple trays on which the rollers need to be placed while transferring the rice & lentil batter, the invariable drips of thick batter on the counter…. you get the point, It takes quite a bit of time.
I was pleasantly surprised when the appliance company, Ninja asked me if I’d like to try any of their appliances (the Ninja team at BlogHer Food ’13 were real stars in terms of the delicious food samples they made on site). I accepted their offer and picked the Mega Kitchen system. Unlike smaller passive gadgets such as scoops & knives, Electrical appliances cannot be verified with one successful try. I had to run the machine through multiple testing sessions before I could bring myself to vouch for it (even though , the delighted cook within me was already raving about the machine to anyone who listened).
In my opinion, Dosa batter is definitely one of the toughest tasks that any kitchen blending system can be tested with. First, soaked, hydrated rice turns to the consistency of concrete when blended and this puts quite some strain on the motor. The Urad lentils have a glutinous texture and grinding this to a smooth paste is non trivial, let alone eventually whipping the batter into a light airy texture.The aerating part seems to be tackled perfectly by the design if the blender has to survive for a number of years in a traditional Indian Kitchen. (we Indians lay a lot of emphasis & importance on the durability factor).
In Ninja’s blender jar, 6 blades (which can be removed for cleaning easily) stacked up over each other ensure that the lentils & rice are pulverized with out having to go through that whirlpool motion of the conventional models that draw the ingredient down. The Ninja system packs a punch in terms of power – 1500 watts of power.
The entire system consists of a Large blender jar (which I’ve been regularly using for making Dosa batter), a dough & food processor attachment, and a small single serve smoothie attachment which I find perfect for grinding masalas & dry spices such as the classic Milaga Podi (pictured above).
New York Times had published an article last year about pairing Dosas with Champagne, and of course, I simply HAD to test it for myself. The yummy (and pleasantly tipsy) brunch that followed the photography session verified NYTimes claim to a T, with the emphasis that it paired best with Dosas made with Ghee instead of sesame oil (as the regular day to day breakfast menu goes). While the recipe below describes the traditional way of dosais, I opted to make miniature versions of the dosas topped with a marble sized scoop of the Masala.
Masala Dosais:
- 1.5 cups Jasmine rice
- 1/2 cup Spilt dehusked Urad Dal
- 1 teaspoon Salt.
- Melted ghee (for drizzling over the dosai) and Sesame oil (for brushing over the griddle)
- Rinse & soak the rice & lentils separately in plenty of water for about 2 hours (preferably overnight).
- Grind the rice to a thick paste in a blender. Transfer to a large container. Repeat with the lentil, taking care to add sufficient water while blending to obtain a batter which is somewhat fluffy in consistency. (like beaten egg whites). Combine the rice & the urad batters with the salt taking care to mix well using your hands (yeah , its messy, & the batter isn’t even worth licking!).
- Cover & place in the oven with the light switched on over night. Alternatively bloom a packet of yeast in warm water and add to the batter. Allow to rest for an hour. Mix well before making the dosai.
- Heat a cast iron griddle. Add a teaspoon of oil & wipe it using a paper towel. When the pan gets really hot, pour about 3 oz of the batter in the center & spread it around using the rounded side of the ladle. Drizzle with 1/2 a teaspoon of sesame oil. (the batter will bubble up leaving nooks & crannies on the surface. when the lower side begins to turn golden brown carefully flip the dosai over & cook till the other side turns a similar color. Serve with your choice of chutney, or jam, or even just a dollop of yogurt.
- For making dosais with the potato filling, spread the batter on the griddle & drizzle with the melted ghee. (Cover with a large lid & allow the top side to steam cook.). Remove the lid, and place a scoop (ice cream scoop ) of the potato masala in the center. Using the spatula, gently roll the dosai around the filling. (Like rolling a burrito, but without tucking the sides in, I guess like a cannoli). serve with your choice of chutney, or sambhar.
Potato masala:
- 4 large idaho potatoes, boiled & peeled
- 1 large onion, quartered & thinly sliced
- 1 tablespoon finely minced fresh ginger
- 1 jalapeno, deseeded & finely chopped
- 1 sprig curry leaves
- 2 tablespoons canola or olive oil
- Salt to taste
- Juice of 1 lime
- 1 teaspoon whole black mustard seeds
- 1 teaspoon cumin seeds
- 1/4 teaspoon Turmeric powder
- crumble the boiled & peeled potatoes. Set aside
- Heat the oil in a skillet, when it just begins to smoke, add the mustard & cumin seeds & allow to sputter. Add the curry leaves and the onion. saute till the onion turns translucent.
- Add the crumbled potatoes, salt and turmeric powder. Sprinkle with some water, stir, lower the heat, cover & cook till the flavors combine. remove from heat, add the lime juice.
The Ninja Mega Kitchen System is available online via their website , or Amazon.com ( Ninja Mega Kitchen System – Model BL771) or at any retailer in the United States or Canada.
A big Thank you to the folks, especially Sarah Knutson at Ninja Kitchen Systems for the opportunity to test this appliance!
Bon Appetit!
Somewhat Rare Treats – Banana Stem Stir Fry
The banana tree has often been described as a perfect example of being totally useful from root to fruit. (well, considering that the ‘tree’ is in reality a mutant, giant grass, the description begs for quite a bit of clarification). The banana ‘plant grows from fat squat entities called corms which are the actual stems of the plant, the ‘trunk’ in reality is the base of the leaves which are tightly layered in concentric layers. In terms of its use, other than the fruit, the inflorescence (banana flower) is often used as a vegetable in Asian cuisine, the leaves are used for wrapping food for steaming, as disposable plates and the occasional umbrella. The fibers from the exterior part of the stems are used for textiles as well as yarn.
The core (or the heart) used for cooking consists of the central, compressed part of the stem, the part which cannot be peeled off in layers. Its been used as a folk remedy for kidney stones and thanks to its fiber rich nature, its a great vegetable to add to your diet for weight control. (Its another story that the stems are rarely seen even in the ethnic grocery stores here in the US of A).
The prepping process is not straight forward. The instant the stem is cut, it turns brown due to oxidation. For this purpose, the diced bits need to be immediately immersed in acidulated water ( for some reason, the medium of choice is water mixed with a ladle of diluted yogurt or buttermilk).
When the stem is sliced into coins, the immature fibers that stretch out need to be removed. Don’t get grossed out, these are not slimy like Okra or sticky like spider webs.
They’re more like strands of delicate cotton that are pretty strong enough to lift the slice of stem.
The optimal way to extract them is to gently twist the fibers out of the stem, using your index finger and discard.
The coins are then diced and added to the acidulated water, and left for about 1/2 an hour.
The banana stem by itself does not have a particular flavor, just a delicate vegetal, grassy aroma. This make it the perfect vehicle for adding your choice of spices as per your preference. The crunch of the vegetable even after cooking gives it a textural distinction that is rather delightful.
Banana Stem Stir Fry:
You need:
12″ banana stem core.
4 cups of water (whisked in with 1/4 cup buttermilk or yogurt)
2 tablespoons olive oil
1 teaspoon mustard seeds
2 arbol chiles broken into bits
1 teaspoon split urad dal
1 pinch Asafetida powder
1/4 teaspoon Turmeric
1 sprig fresh curry leaves, torn
1/3 cup shredded coconut
salt to taste
Coconut oil for finishing
Prep the banana stem as per the instructions listed above.
Drain the yogurt/water mix and transfer the diced stems to a pot containing water with the turmeric added. bring to a boil and cook the stems for about 15 minutes until they’re pleasantly crunchy to the bite. Drain the water and reserve the stems.
Heat the olive oil in a wok and add the mustard seeds & the urad dal, just as the mustard begins to sputter add the broken arbol chiles and the torn curry leaves along with the asafetida.
Toss in the cooked stems, stir to combine. Add the salt and stir fry on medium heat until any residual water has completely evaporated. Stir in the shredded coconut to evenly distribute it. and transfer to a serving dish.
Drizzle with the coconut oil prior to serving.
Serve warm with rice and traditional South Indian dishes such as Sambhar & kootu.
Bon appetit!
Cherry O Cherry O Baby! – The 10 lb Cherry Challenge!
There is something about cherries that is utterly addictive. Its a combination of factors, the size – that enables you to scarf down a whole fruit at a time, The childish delight that invariably suffuses you when you sit outside on a balmy summer evening with a big bowl of freshly washed cherries spitting out the pits, one by one (Yes, its summer companion, the watermelon allows for that as well, but the seeds just do not have the size and shape that allows for a good projectile), and of course the fact that the season is so short and fleeting simply means that cherries get their rightful priority.
OXO and NorthWest Cherries sponsored a cherry challenge where they invited bloggers to host a Cherry party with friends and blog about the experience. Each participating blogger received a set of nested mixing bowls with colanders, a weighing scale & cherry pitters from OXO and 10 lbs of the best cherries that you could ever find from the cherry growers association. They were wonderfully accommodating in allowing me to do a solo cherry marathon and it was a wonderful experience indeed. In my true style, I could not decide on any one recipe to work on and before I knew it, the recipes began piling up.
Here’s the list.
1. Cherry Compote for an Indian style Cheesecake.
2. Basil infused Cherry-Lime Granita.
3. Summer veggie Cous cous salad with a smoky Cherry Chipotle dressing.
4. Boozy Cherries! (Cherries in Bourbon with basil simple syrup).
6. Cherry Jam with Lemon zest & Mace.
Just click on the Tab on the top of the page to access the recipes. Bon appetit!
Adapting from Classic Recipes: Israeli couscous & Beluga Lentil ‘Khichdi’
This has probably been the longest gap between posts for me. A Kitchen renovation project that stretched over 3 weeks and the consequent restocking which took longer than I had imagined. How I managed with ingredients stored in plastic bags & the packaging it came with, I have no idea. I had to make many multiple trips to pick out bottles, containers and little organizing shelves in order to accommodate all the ingredients that have become pantry staples. but in the end the effort was well worth it. The last count, I had about 60 different herbs, spices & blends, but that’s for another blog post!
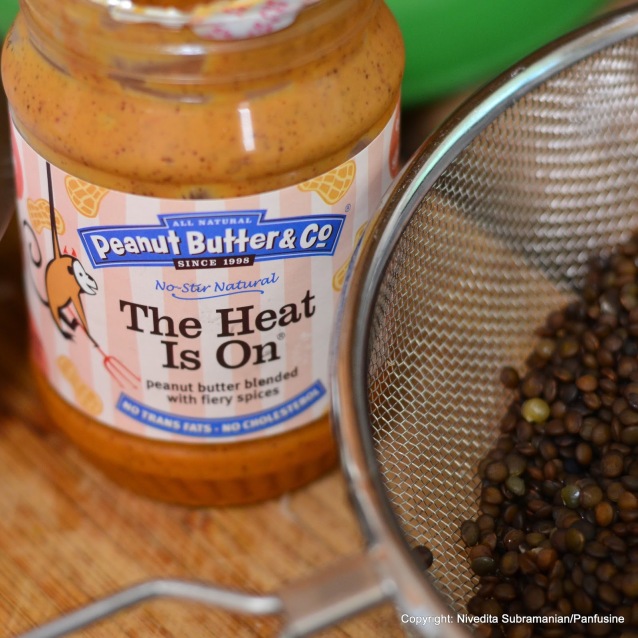
During the BlogHer Food 13 meet, I had the chance to meet professionals from a number of food companies, one of them being Adam Shapiro of the Peanut Butter & Co. During the course of discussing how Peanut butter figured in Indian cooking, he told me about this spicy variety that they were introducing and offered to send me a sample. When I received a jar of ‘The heat is on‘ a couple of weeks later, I was hooked onto the spicy taste. It was hard to wait till I had a working kitchen to start creating dishes with this absolutely delightful ingredient.
The fresh peanut flavor combined with the heat from Cayenne pepper & chili powder is rather addictive. Although the ingredients listed include vinegar, there was hardly any trace of it even to my vinegar averse sensitive palate, and I almost longed for a tangy complement to the flavor. When it came to looking for dishes to incorporate the peanut butter in , I realized that a number of recipes from the western Indian state of Maharashtra use roasted & crushed peanuts as a finishing ingredients. And thus came about my brunch earlier today, a twist on the classic Sabudana (Sago/tapioca pearl) Khichdi. The tapioca pearls have been substituted with Israeli Couscous (or Fregola).
Israeli Couscous & Beluga Lentil ‘Khichdi’
You need:
1 cup Israeli couscous
1/2 cup beluga Lentils (feel free to substitute any regular whole lentils)
2 tablespoons oil
1 teaspoon black mustard seeds
1 teaspoon cumin seeds
1/2 a jalapeno chili deseeded and diced
1/2 cup diced red onions or shallots
7-8 fingerling potatoes
salt to taste
2 heaped tablespoon PB & Co’s spicy peanut butter OR
1 heaped tablespoon each of the crunchy peanut butter and the spicy variety.
Chopped cilantro for garnish.
Juice of 1 lime
Fill a saucepan with cold water and add the lentils along with the fingerling potato. Bring the water to a boil and cook the lentils for about 15 minutes until soft. (the fingerling potatoes should be done in this time as well). Drain the water, peel the potatoes and cut into 2 pieces each. Set aside.
Refill the same pan with more water, add salt and bring the water to a boil. Add the Israeli couscous and cook for about 5 minutes. Drain the water and set aside.
In a large skillet, heat the oil until it shimmers. Add the mustard and cumin seeds. Once the mustard sputters and the cumin ‘splits’ add the deseeded jalapeno and the onion. Saute until the onion turns translucent.
Add the lentils and the potatoes, lower heat and saute for about 5 minutes.
once the potatoes begin to turn golden, lower the heat (you want the peanut butter to stick to the lentils & potatoes, not to the bottom of the skillet!) and add the couscous along with the peanut butter (adding a mix of the spicy and the crunchy varieties ensures that the heat is balanced and there are bits of nuts to bite into for a texture variation). Stir to coat the lentils,couscous and the potatoes evenly. At this time taste and adjust the amount of salt according your personal preference. Cover with a lid, turn the heat to the lowest level and allow the flavors to combine.Transfer to a serving dish, garnish with chopped cilantro and finish by drizzling the lime juice as per your preference.
Bon appetit!
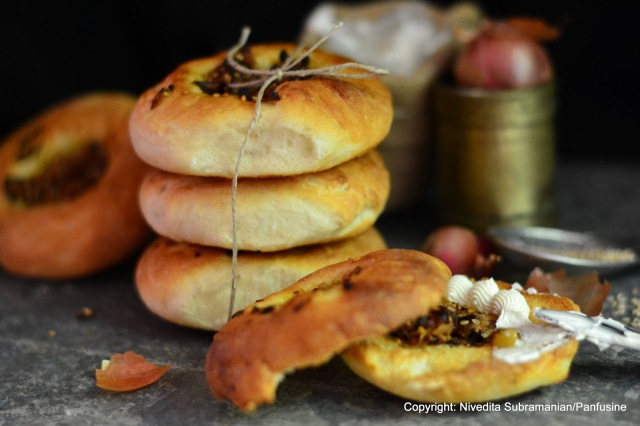
The ‘We Knead to Bake’ Project 2013 – Bialys (with toasted shallots in a Tamarind relish)
This spicy & tangy relish is the flavoring behind the iconic Tamarind rice and many a South Indian emigre to the US of A and all over the world are guilty of smearing their toast with a dab of this umami laden relish. (I’ll post the recipe for the relish in an upcoming post, but its readily available in most Indian grocery stores).
 |
| Spiced Tamarind & Shallot (r) & sauteed Leeks with Za’atar seasoning (l) |
Place the shaped dough on a parchment lined (or greased) baking tray leaving about 2 inches space between them. Place the caramelized onion filling in the depressions of each Bialy. Brush the outer dough circle with milk.
Alternate fillings:
finely slice a cleaned leek (just the white and light green parts) and sautee until translucent in one tablespoon of olive oil. Add 2 tablespoons of Za’atar to the leeks and season with your preferred amount of salt. Allow to cool and fill the Bialy’s as per the recipe.
Bon Appetit!. & yes, this recipe is being Yeastspotted


