Category Archives: condiment
My own little Tomatina fest..
Last year at this time, I bought (and fell head over heels in love with the idea of) a bushel of tomatoes (in two batches of about 25 lbs each). At this time of the year , my local farm sells these gorgeous plum tomatoes by the bushel,
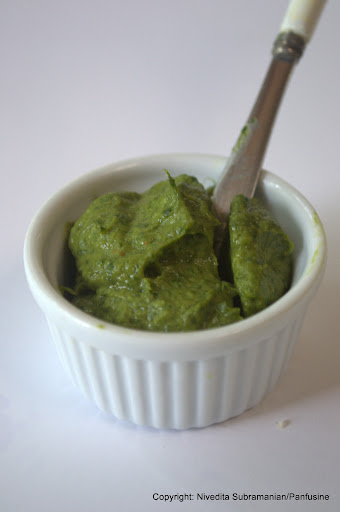
Finger foods..& a recipe for Avocado mint spread.
Whats it about having a whale of a time with friends & Family?. It makes it so hard to get back to food. While I wait for my local farm to open up their fresh vegetable stand (June 23rd), Its back to trying small dishes, amuse bouches as Le Francais call them.
I’ve never really got too attached to Avocadoes, (a.k.a butter fruit) despite growing up with an avocado tree in my backyard a long time ago in Nairobi, Kenya. For some reason, they always remind me of Trixie, my landlady’s dog. A neurotic German shepherd that constantly yapped & pounced upon anyone who wandered with in the radius of of the length of his leash which was constantly tied up to the said avocado tree. To cut a long story short, the extra ‘hydration’ provided by ol’ Trixie ended up killing the poor tree!
I fell in love with the fruit all over again at the suggestion of a friend whose recipe I tried out. There is something amazing about the smooth butteriness that works perfectly as a 2 – in – 1 ingredient for a chutney sandwich and I had a whale of a time scarfing down these sandwiches, along with a plate of canapes, and even dosa!
Avocado & Mint Cutney:
1 ripe Avocado
1 cup cilantro, packed
1/2 cup mint leaves
1/4 cup shallots
1 Jalapeno deseeded
juice of 1 lime
Salt to taste.
1/2 cup Feta Cheese (optional)
Cut the Avocado lengthwise, twist to separate the halves. remove discard the pit and scoop the soft flesh into a blender jar. Add the lime juice, shallots, jalapeno, mint & cilantro (& feta cheese, if using). Pulse to a smooth paste (with the consistency of sour cream). Add salt & adjust for taste. Transfer to a container & store in the refrigerator until needed.
Use this as a spread over white bread. layer with thin slices of boiled golden beet and sprinkle with toasted cumin. finish the sandwich using another slice of bread & avocado chutney. Cut into triangles and serve.
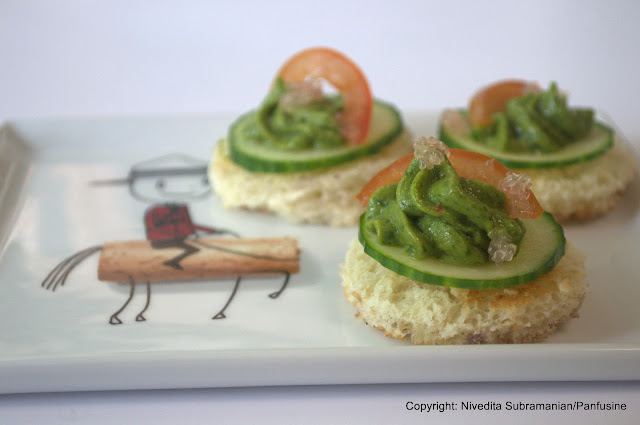
Using a piping bag, or a squeeze bottle with a star tip (Crate and Barrel) is a great idea if you want to decorate open face sandwiches for parties.
Lightly toast slices of white bread and cut into circles using a 1.5 inch cookie cutter.
Place a thin slice of cucumber over the circles of bread and pipe the avocado chutney over. Garnish with a sliver of tomato and finger lime beads.
Taste from Waste II – Pumpkin ‘Brain’ Chutney
Yeah OK, we’re at the end of pumpkin season, waiting anxiously for that yoda like rodent, that prognosticating groundhog from Gobbler’s Knob, Punxsutawney, PA to announce to the world about when spring 2012 will be here (sheesh!, the best weather predicting satellites & software & we still defer to the groundhog!).
Well, as long as the cold weather is here, we’ll be making do with potatoes, pumpkins, and greens from the Brassica family such as cabbage, cauliflower & kale, not there is anything to complain. In fact, personally, I could live on potatoes alone!
Having said that, the topic of food waste still buzzes within the cranium and a pumpkin is one example of multiple components of the vegetable used up. The flesh needs no introduction, its baked, roasted boiled & pureed (thats 4 potential recipes for the future right there), the toasted seeds are used for stadium snacks, an aromatic gourmet oil & in granolas & topped over muffins. All that is discarded is the tough peel and the fibrous center encasing the seeds, colloquially referred to as the ‘brains’…
The fibrous center has been the star of a chutney recipe handed down from my great grand mother. (yep.. the cauliflower relish ‘paati’s’ mother), and within the family, it goes by a rather strange name.. Yaanai thalai thuvaiyal (Elephant’s head chutney). The reason, I’m told, was that the old lady would reprimand my dad (when he was a young kid) about scarfing down large quantities whenever this was made, and the rather colorful description was likened to the volume of an elephants big head!. Whatever the reason, it seemed to make all the more sense when I came across a website describing the central webby part as pumpkin brains!
The fibrous part from a freshly cut pumpkin has a yielding crispness which wilts pretty quickly, so its advisable to pick the center out, remove the seeds & refrigerate or freeze in a ziploc if not using immediately.
Yaanai Thalai thuvaiyal:
1 cup central filaments from a medium sized pumpkin (without seeds)
1/3 cup shredded coconut
1/2 cup Cilantro leaves
1 sprig curry leaves
2 tablespoon Tuvar dal
2 tablespoon Split, dehusked Urad dal
2 dried red arbol chiles
1 teaspoon black mustard seeds
1/8 teaspoon asafetida powder
Salt to taste (~ 1/2 – 3/4 teaspoon)
1 tablespoon olive or canola oil
1 tablespoon tamarind pulp (NOT concentrate)
Heat the oil in a skillet and add the mustard seeds arbol chiles & the dals. toast over medium heat till the dals turn a reddish brown, the mustard starts popping, and the arbol chiles begin to change color. Add the Asafetida powder, and transfer in a bowl to slightly cool.
In the same skillet, add the pumpkin filaments and sautee till it releashes water & cooks down, add the torn curry leaves give it a stir and transfer to a blender jar along with the toasted dal mixture.
Add the coconut, salt, cilantro & the tamarind pulp and blend until the ingredients combine into a semi fine consistency, similar to guacamole.
Transfer to a serving dish & serve along with plain boiled rice and pappadoms.
Here’s to recipes from scrap! Bon appetit!
Taste from Waste – Cauliflower stem relish!
In the interest of full disclosure, I missed watching Food Networks special show ‘The Big Waste’ and am scrambling to catch it in bits and pieces via YouTube.. Its shameful the amount of food that is discarded in what can only be described as cavalier. I remember getting quite shocked when watching Rachael Ray’s show 30 minute meals & seeing her rrriiiip out 2 layers of onion before dicing. and Iron Chef America… don’t even get me started!
Blame it on my Indian sense of thrift, but I’d always seen the papery layer peeled out carefully to retain the fleshy parts and just the bare minimum of the root end gouged out. Ditto with a multitude of other produce put to completely full use, peels, seeds, shoots, even the occasional coconut ‘going south’, you name it, there is quite possibly a wonderful dish centered around it.
Given the shocking statistics regarding food waste, I was quite curious to find out how my local grocey store Wegmans dealt with produce . I went about asking the gentleman at the ready cut produce counter what they did with the stems from cauliflowers and was quite delighted to find that they used the stems to make soup (or most probably, stock for the soup). Oh well, that just meant that I had to buy a whole head each of broccoli & cauliflower to get to this weeks recipe.
The cauliflower stem relish was a staple at home in Mumbai, cut into ‘oh so tiny perfect cubes’ by my foodie fanatic dad. I believe the original idea was from my uber thrifty grandmother. (She could drive everyone up the wall with her brand of ‘reduce, reuse, recycle’.) The attention to detail showered on the knife work takes the final product up to a higher level. Yes, you could make easy work by simply shredding the center stem, but then, the textural aspect leaves a lot to be desired.
Quick Cauliflower stem relish
You need:
1 central core from a medium sized head of cauliflower
1 central core from a smallish head of broccoli
1 teaspoon kosher salt
1/2 teaspoon cayenne chili powder
1/4 teaspoon Turmeric powder
1/8 teaspoon asafetida powder
1 tablespoon coarse black mustard powder
Juice of 1 lime
1/4 cup sesame oil
Remove the ‘branches’ of the cores and peel the tough fibrous outer layer. Dice the crisp central ‘marrow’ into a uniform small dice to yield about 1 cup (8oz).
Add the salt and all the other ingredients except the lime juice and oil. Toss till the seasonings are dispersed evenly
Heat the sesame oil in a cast iron pan till it just starts smoking. Pour the hot oil right over the seasoned cauliflower/broccoli stem. The oil should be hot enough for the whole thing to sizzle loudly!
Stir in the oil to cover the produce and also cool slightly. Stir in the lime juice. Allow to rest in the refrigerator for about an hour before serving as a condiment alongside rice, dal, or any traditional Indian curry.
Here’s to creating great food from scrap! Bon appetit!
For more tips on minimizing food waste, take a look at this link
Something old….
Its that time of the year gain, the heat, humidity & the general enervation that goes hand in hand with summer. But, as tiring as the heat can get, Lets face it, we do not have to resort to the freezer for vegetables & that is always a good thing.
I’ve resolved that I’m going to treat myself to fresh produce as far as I can & fortunately, I found this awesome place, Hillsboro farm that grows & sells uber fresh veggies and its incredible to rediscover what a fresh homegrown tomato tastes like. Incomparable! So, for the time being the cans have been canned in favor of Fresh.
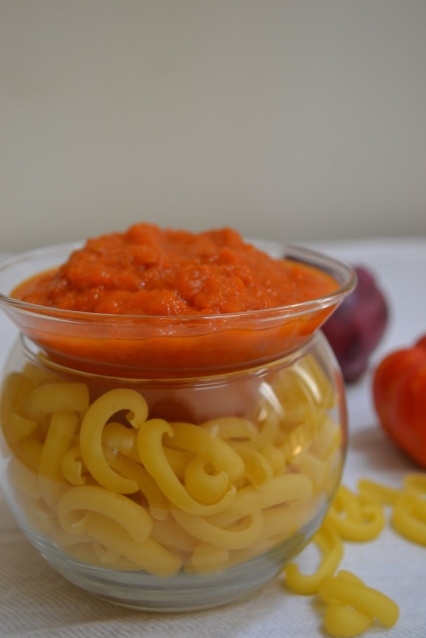
Of course, its no use talking about fresh if you don’t have a recipe to do the flavors justice, for starters, take a look at this article from the New York Times by Mark Bittman on Proper ways to treat an Heirloom. And, fortunately there is no dearth of applications for how to dress a tomato!. The first is a traditional Italian recipe for a simple Tomato sauce, and the other, a traditional (well, as traditional as a Panfusine recipe gets anyway ;-)) South Indian tomato ‘thokku’ or relish, spiced up with roasted jalapeno.The point to note is that the techniques for both these almost stem from an identical starting point and yet, the end results are a culinary world apart. Just take a look at this video from food52.
I came across the first recipe on Food52.com. Its an unbelievably simple recipe for a tomato based pasta sauce with exactly three ingredients (not counting the salt). This was the first time, I confess that I heard the name Marcella Hazan, but she’s rightfully regarded as the ultimate authority on Italian cuisine.
To give you a brief idea of the person behind the dish, here’s an excerpt from Craig Seligmans review of her book Marcella’s Italian Kitchen![]() from Salon.com:
from Salon.com:
Who wouldn’t be a little bit intimidated by Marcella Hazan’s revulsion at “the pallor of deep-freeze counters, those cemeteries of food, whose produce is sealed up in waxed boxes marked, like some tombstones, with photographs of the departed”? By her dismay at the “undiscriminating condemnation” of that “vital substance,” salt? (“When I try something new, even after I have seasoned it to my satisfaction, I sprinkle a touch more salt on a separate biteful.”) By her wholesale rejection of cold pasta? (“If I had invented pasta salads I would hide.”) By the exuberance of her disdain for innocent cinnamon? (“I loathe cinnamon, so the less said about that the better.”)
For more than 25 years now Marcella Hazan has been goading, browbeating, hectoring, shaming and, not incidentally, inspiring her readers into preparing Italian cuisine the proper way, which is to say, according to the traditional methods of the Italian kitchen. I use all five of her books all the time, but my favorite is her third, “Marcella’s Italian Kitchen,” in which she starts to break away from the wrist-slapping classicism of her groundbreaking early volumes, “The Classic Italian Cook Book” and “More Classic Italian Cooking,” and lets her imagination play a little.
 |
| Image credit: Melissa Lyttle for The New York Times |
Marcella Hazan’s Tomato Sauce with Onion and Butter: (Ref:Food52.com)
In the interest of full disclosure, the measures used were strictly approximate, I’m sure Marcella would approve!
1 kg ripe tomatoes
~ 6 tbsp butter
1 large onion, cut in exactly 2 pieces (bisected)
Salt to taste.
Heat water in a large pot & bring it to a boil. Drop the tomatoes, piercing them with a knife. When the skin splits, remove them carefully, allow to cool and peel. Add to a blender & puree.
In a large saucepan, combine the tomato puree, butter, salt and the onion. Simmer until the puree is thickened to the consistency of sauce and the butter floats up in little droplets. (stir it back in). Remove the onion halves (which are spectacularly delicious, just smooshed up with left over rice). Serve over pasta.
Tomato relish with smoked jalapeno & arbol chile
In the true spirit of nothing ever should go to waste, my thrifty grandmother would buy up the less than perfect ‘yesterdays’ tomatoes from the vendor, striking up a good bargain, & invariably, this haggling session would be followed by a heavenly aroma of tomato chutney brewing from the kitchen in the afternoon. The tartness of the tomatoes is complemented well by the smokiness of the toasted arbol chiles. In addition to the dried arbol chiles, my variation includes roasted jalapenos in the mix for an extra kick. I pair this with anything from toast to mixing it with plain rice. Although this would work with a can of crushed tomatoes , nothing compares to making this with ripe heirloom tomatoes fresh from Hillsboro farm around the corner from home.
4 Jalapeno peppers
4 dried arbol chiles
1/2 cup Canola oil
1/2 teaspoon Asafetida powder
1/2 teaspoon Turmeric powder
1 tablespoon black mustard seeds
1 teaspoon fenugreek seeds
2 sprigs curry leaves (~ 20-24 leaves)
1.5 teaspoons brown sugar
kosher Salt to taste (~ a tablespoon)
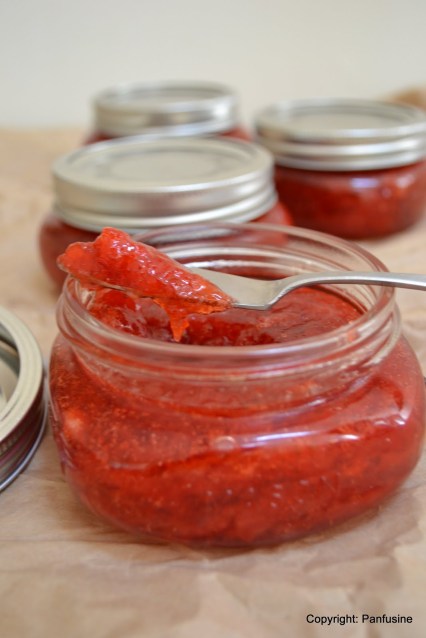
Good ol’ strawberry jam.
Sometimes, all you seek is good ol’ vanilla ice cream… or strawberry jam over toast.
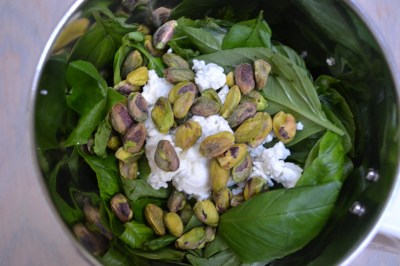
My other half is convinced that I’m on the path to make my five year old into a chef… he already is a foodie with a sharp sense of taste and aroma. Last friday, he was a very happy boy when I made him this fabulous Feta, pine nut & mint pesto by coffeefoodwritergirl that was posted on Food52. with a little necessary tweaking , (the Pine nuts that I got were labeled ‘chilgoza’ from the Indian store, were probably harvested last century, they tasted quite old!, so) necessity being the mother of invention, and my teensy greed for a spectacularly green pesto, I made do with some handy pistachio.
& yes, my pepper grinder was nowhere to be seen either (I suspect, it will surface under the entertainment cabinet tomorrow, courtesy my 2 year old, who seems to be on a mission to transfer the entire contents of my kitchen to the ‘green pillow’ room (a.k.a the family room), So.. in went a half a spike of pickled green peppercorns fresh out of brine… (more of the color to satisfy my greed for green)
Less than the length of a Beyonce song later, I had this wonderful condiment:


